Reflective Road Studs: Installation Positions, Methods, and Spacing
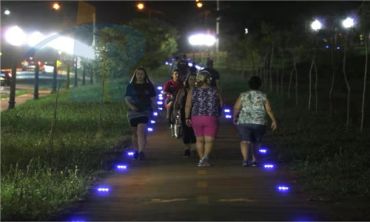
Reflective road studs, often known as cat’s eyes, play a crucial role in enhancing road safety by providing visual guidance to drivers during nighttime or adverse weather conditions. Their proper installation, including position, method, and spacing, directly impacts their effectiveness and durability.
Installation Positions of Reflective Road Studs
The effectiveness of reflective road studs depends on their placement. Here are the most common positions:
- Highways: Installed along lane dividers and shoulders to improve lane discipline at high speeds.
- Intersections: Placed to highlight stop lines and guide drivers through complex junctions.
- Pedestrian Crossings: Used to alert drivers to crossing zones, especially at night.
- Tunnels: Provide consistent guidance where natural light is absent.
- Curves: Enhance visibility on sharp turns, reducing accident risks.
- Parking Areas: Define boundaries and improve traffic flow in lots.

Installation Methods
Several methods are used to install reflective road studs, depending on road surface and traffic requirements:
1. Epoxy Adhesive
Epoxy resin provides a strong bond between the stud and asphalt or concrete. It is suitable for most urban roads.
2. Hot Melt
Hot-melt adhesives allow for quick installation and strong resistance to weather conditions.
3. Mechanical Fixing
Studs are secured with bolts or screws, ideal for heavy-traffic highways or concrete surfaces.
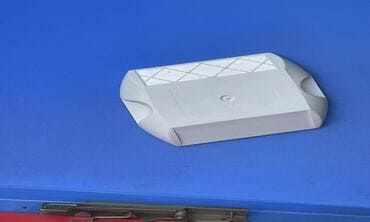
4. Solar Stud Installation
Solar-powered reflective studs require wiring or battery placement, ensuring sustainable illumination.
Installation Spacing Guidelines
The spacing of reflective studs ensures proper visibility. General guidelines include:
- Urban Streets: 3–5 meters apart.
- Highways: 6–12 meters apart.
- Sharp Curves: 2–3 meters apart for maximum guidance.
- Tunnels: 2–5 meters apart for continuous visibility.
Factors Affecting Spacing and Positioning
- Traffic Speed: Higher speeds require closer spacing for quick visual cues.
- Road Type: Highways vs. urban streets demand different approaches.
- Visibility: Weather, fog, and lighting conditions influence spacing.
- Local Regulations: Standards may vary by country or region.
Step-by-Step Installation Guide
- Clean the road surface thoroughly.
- Mark the positions according to spacing guidelines.
- Apply adhesive or prepare mechanical fixing.
- Place the reflective stud firmly and ensure alignment.
- Allow curing or drying before opening to traffic.
- Inspect installation for accuracy and durability.
Conclusion
Proper installation of reflective road studs is critical for road safety. Choosing the right positions, methods, and spacing ensures durability and effectiveness. For best results, consult with professionals and follow local standards. Discover more about solar reflective studs here.
FAQ: Reflective Road Stud Installation
1. What is the ideal spacing for reflective road studs on highways?
Typically 6–12 meters apart, depending on speed limits and regulations.
2. Can reflective studs be installed on concrete roads?
Yes, with epoxy adhesive or mechanical fixing methods.
3. Do solar reflective studs require maintenance?
Yes, periodic cleaning and battery checks are recommended.
4. How long does it take for epoxy adhesive to cure?
Generally 2–4 hours, depending on temperature and material.
5. Are reflective road studs mandatory?
In many regions, they are required by traffic safety regulations.


.jpg)